Hello Crafty friends! Today I have this beautiful JOY card using an exclusive Concord and 9th die and many different Simon Says Stamp products from the recent releases.
Here is a list of supplies used to create this card…
- Concord and 9th – Exclusive Joy Die from Holiday Workshop
- Simon Says Stamp – Snowflake Cluster Stencil
- Simon Says Stamp – Blending Brushes
- Simon Says Stamp Pawsitively Saturated Ink – Cadette
- Simon Says Stamp Pawsitively Saturated Ink – Marine
- Simon Says Stamp – Etched Laurel Leaves
- Simon Says Stamp Embossing Folder MAGNETIC
- Simon Says Stamp – Reverse Christmas Sentiments
- Pixie Spray for Stencil
- Liquid Pixie Dust
- Simon Says Stamp – Big Momma foam Tape
- Simon Says Stamp Dot Tape Roller
- Gina K Connect Glue
- Dark Teal Card Panel
- Simon Says Stamp Mega Thick 130 lb Card stock
- Neenah Solar White 80 lb Card stock
- Neenah Classic Crest 110 lb card stock – card base
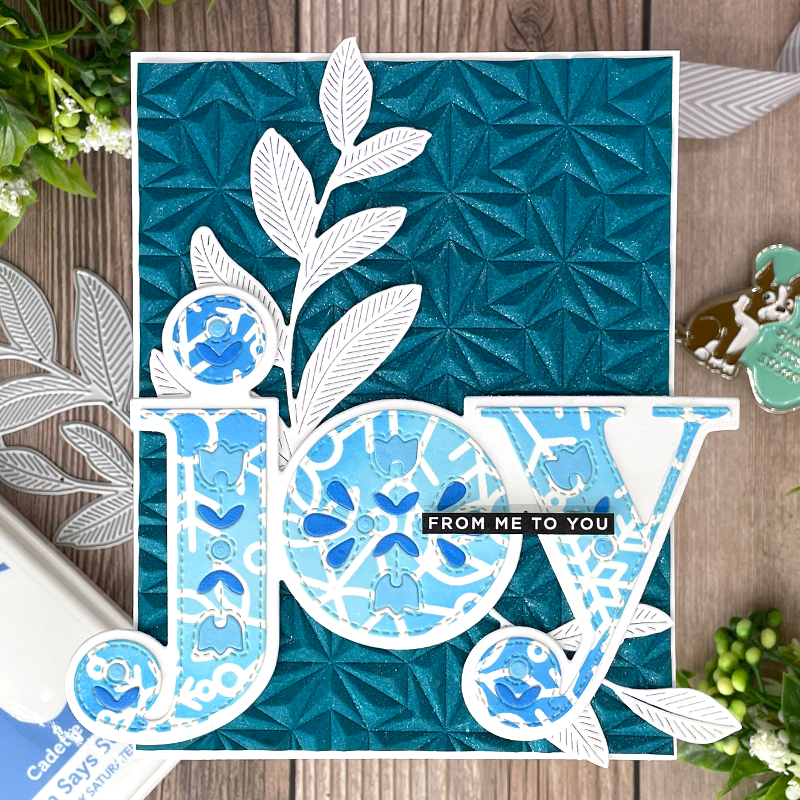
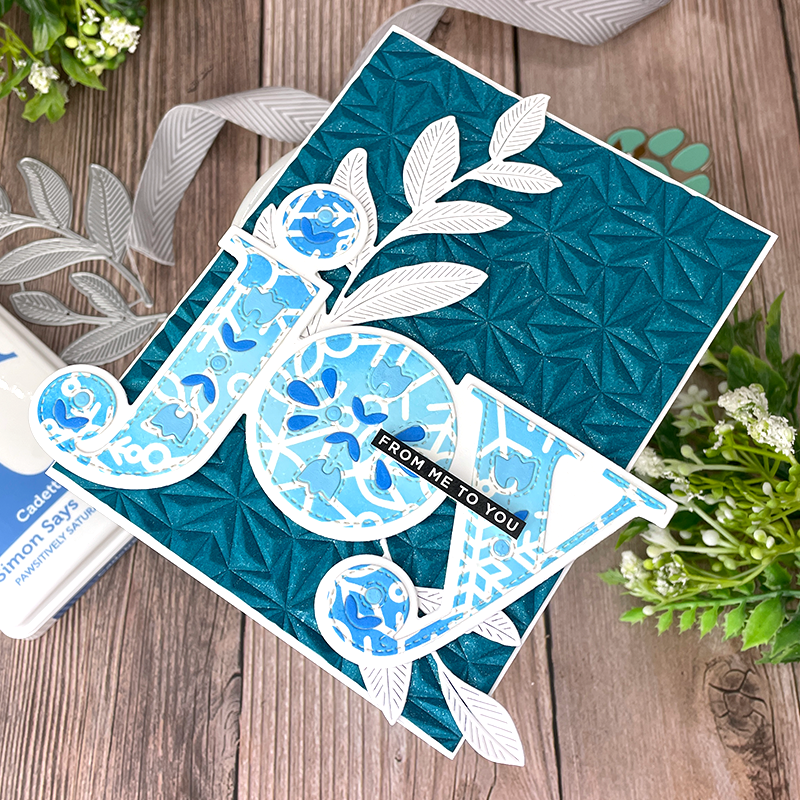
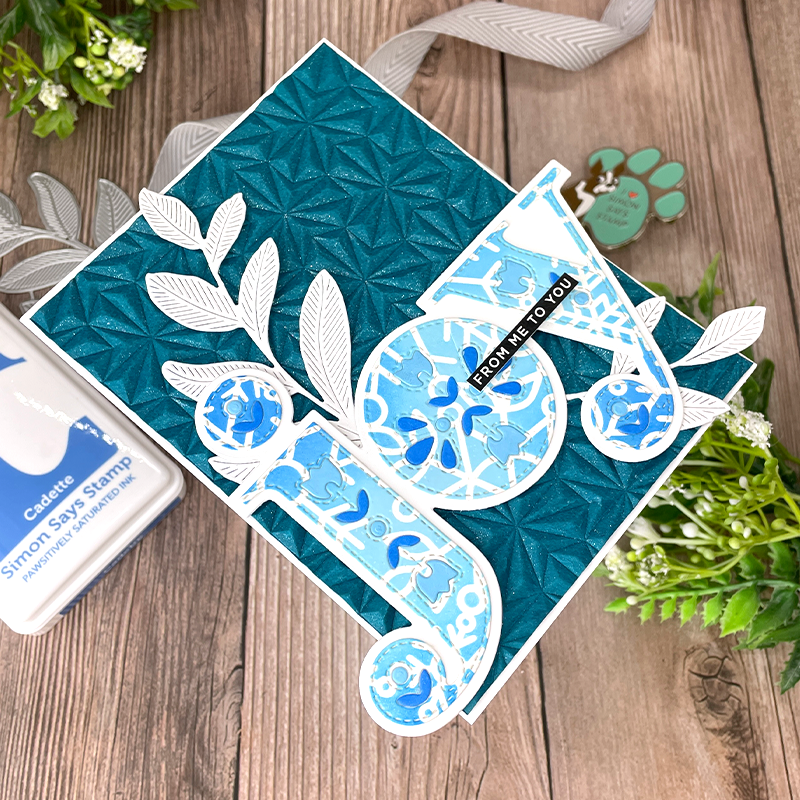
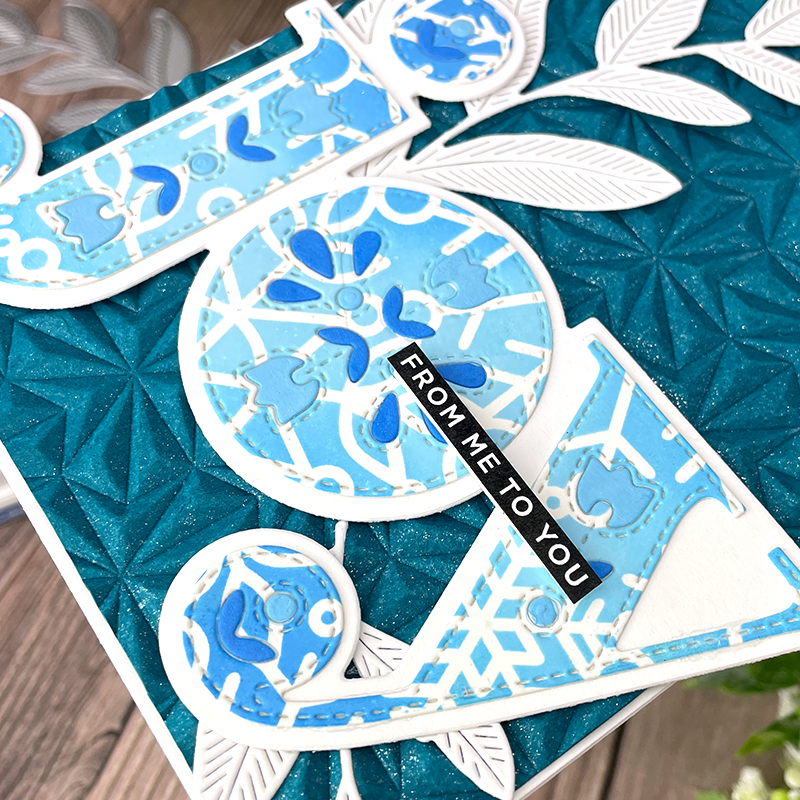
I started by using a panel of Simon Says Stamp Mega Thick 130 lb Card stock (my favorite ink blending card stock) and my Snowflake Cluster Stencil. This is a really delicate stencil, so I sprayed the back with Pixie Spray so that I could get a nice crisp design when I was blending. I spritzed the stencil then fanned it for about 20 seconds before laying it down on the panel. I grabbed my Simon Says Stamp – Blending Brushes and my new favorite colors of Pawsitively Saturated Ink – Marine and Cadette. These are seriously my new favorite colors!
I was random with my concentrations of colors. I wanted to make sure there were some light spots, as well as some dark. Once I was happy, I removed the stencil and washed it immediately. Next, I grabbed the large joy die from the Holiday Workshop that Concord and 9th put on. I aligned it on the panel in a diagonal manner to be able to use the card panel as well as the cut out letters (there’s another card coming!). When I had the letters cut out, I did the shadow die out of white. I wanted the inserted florals to match, so I swiped my inks onto a sheet of white paper and let it dry while I clued the letters down. Once I had the letters glued, I used the additional die cuts to cut out the floral dies to then glue into the letters. I went to work placing the die cuts in and using my Gina K Connect Glue.
I set the Joy to the side to dry and grabbed a teal color of cardstock. I cut it down, slightly smaller than an A2 panel and then grabbed my new favorite embossing folder – MAGNETIC. This folder is STUNNING! I spritzed the paper with a home made version of pixie spray (I used Liquid Pixie Dust and some water in a spray bottle). I spritzed the paper twice and then ran the embossing folder through my die cut machine. I also used the Etched Laurel Leaves die and cut them out of Neenah Solar White 80 lb Card stock.
I let the background dry for a minute before gluing it to my card base. I then proceeded to assemble my card and popped the joy up with some Big Momma foam Tape and added a Reverse Christmas Sentiment!